Showing posts with label Greenmarket. Show all posts

October 23, 2008

Save Your Parmesan Rinds!

The good news is that I got the internet working on my computer again. The bad news is that I'm sick. I stayed home from work today, lounging on my bed with my napping dog to keep me company. Somehow, earlier in the week before I came down with this cold, I had the foresight to make a big batch of soup, which is interesting because I'm usually not much of a soup person. Must be the chilly fall weather.


Well I'm glad I had this tasy lentil vegetable soup to warm my aching bones for lunch this week. Paired with hearty whole wheat toast, it was just what I needed. That, plus hot toddies and lots of sleep and bundling up in warm clothes and episodes of Mad Men and a leisurely walk in the autumn air, have me feeling a lot better this evening.

I had a couple rinds of old parmesan in the freezer, because I'd heard that throwing a parmesan rind in soup is a great way to add flavor. I was pleasantly surprised to see that it was true - the rind melted and added much needed salt and richness to what would otherwise be a somewhat bland soup. I will definitely continue to freeze parmesan rinds once they're too stale to grate, and use them in future soups and stocks. It's the thrify way to go!

Lentil soup doesn't require an exact recipe. Here are some guidelines:
Soak a cup of lentils in water for an hour. Meanwhile, dice and sautee vegetables in a big pot until softened - I used 3 carrots, 3 leeks, and a bag full of banana peppers, becase that's what I had in the fridge from the farmers market. Add lentils and parmesan rind to the pot, along with enough chicken or vegetable stock to cover it all by an inch or two, add desired spices such as salt, pepper, oregano, sage, crushed red pepper, and then simmer for about an hour until lentils have softened. Remove parmesan rind, and ta da!


As for the bread I paired this with, it was a whole wheat loaf from the farmers market, because the bread I made myself last weekend was inedible. A sad waste of flour. I had no idea what went wrong, since the two loaves of dough felt perfect in my hands until they headed into the oven. As you can see, the crust puffed up , while the bottom layer of dough remained gummy, with a huge pocket of air in between. I had never seen anything like it, and I thought I did something wrong, but it turns out that our oven is broken! This also explains the undercooked eggplant in the eggplant parmesan I made last week, and our inability to bake potatoes into fries in the oven this week. We're getting a new oven this weekend, and I cannot wait to bake some cookies or pumpkin bread or some other tasty fall treat. It's fall, it's cold, and our landlord doesn't like to turn on the heat, so I'm dying to do some baking to warm/cozy up the apartment!

October 16, 2008

Pickled Peppers

As we move deeper into fall and away from the bounty of summer's harvest, I've made some efforts to preserve some summery foods recently, knowing full well what long months of potatoes, kale, and root vegetables lie ahead after last winter. But it's been a kind of half-hearted effort because there's not much you can fit into this freezer. I could have tried to can stuff, but that scares me and I was too lazy to do enough research to figure out how to get over my fear of botulism.


You can't see it all very well because it's hidden by more usual freezer goods such as tupperwared lunches and various flours and coffee, but my freezer now contains: five ears of corn; six quarts of raspberries; two quarts of oven-dried grape tomatoes,; about 8 oven-dried red pepper strips; and three small bags of quartered tomatoes. I can't imagine that will last me very long this coming winter, but it will at least be good for some casseroles, flavored dips and breads, soups and pastas. I let the berries freeze spread out on a flat tray at first, before combining them in a tupperware, so that I'll be able to scoop them out for smoothies, baked goods, and pancakes as needed.

My mom grew an overabundance of cubanelle and banana peppers in her vegetable garden this year, so I've happily taken a bunch off her hands to make pickled peppers. Jesse loves jars of hot peperoncinis, which is what inspired me to try making something similar at home. The recipe is based loosely off Jen's recipe for pickling cucumbers, adapted for making just one pint jar at a time and based on what I have on hand. My first batch didn't have enough heat for the mister, so I also added some jalapenos from the Greenmarket into my most recent batch, and hopefully they'll turn out hotter and spicier. I also must say that I think I like pickled peppers better than my homemade pickled cucumbers (that's why you never even heard about them on here). And I think these peppers would be great on a turkey and cheese sandwich...in fact I might just make that for a picnic this weekend.


Pickled Banana Peppers

3/4 cup hot tap water
1/2 cup distilled white vinegar
1 tbsp sugar
1 1/2 tsp Kosher salt
4 cloves garlic
1 tsbp pickling spice
1 tsp crushed red pepper
1 tbsp whole peppercorns
Several (about a quart) of banana or cubanelle peppers
A few jalapeno or other hot peppers

Combine brine ingredients in a large liquid measuring cup (this will make it easier to pour into the jar later than if you were using a bowl) and stir until salt and sugar are dissolved.

Chop peppers into desired size - strips, chunks, or (my favorite) round crossections.

Place one third of the peppers into a clean glass pint jar, and pour a third of the brine over the peppers. Repeat until jar is full, compressing peppers as needed (a lot more will fit in one jar than you might expect!), and make sure to scoop any straggler spices out of the measuring cup and into the jar.

Refrigerate for a week before eating; pickles will stay good in the fridge for up to a month.

September 22, 2008

Heart Attack Day

I hadn't had red meat in a while, and I'd been craving it for weeks. Finally, last Friday I picked up a package of bacon from Flying Pigs and a cut of Grazin' Angus Acres steak, and then unintentially cooked both meats last Sunday, on what you might call "Heart Attack Day." Except since I eat pork and steak so infrequently, I think it's okay to treat myself once in a while.

Brunch was a spiffed up breakfast sandwich featuring sunnyside eggs, bacon, and sliced tomato on toasted rye bread.


I usually put Jesse in charge of cooking the bacon, but this time I wanted to experiment by cooking one batch in the oven and one batch on the stovetop. Google led me to many rave reviews about how awesome oven-baked bacon is - crisp meat and simple cleanup. But I cannot agree. As directed, I preheated my oven to 400 degrees, lined a baking pan with aluminum foil, laid my bacon down, and put it in the oven. And kept checking. And checking. Recipes indicated that it would only need about 15 minutes in the oven, but after more than 30 minutes it still wasn't crispy, even after turning the heat up to 400. So I took it out and ate it as it was - which was fine, it just wasn't that awesome crunch I was craving.

My stovetop bacon was undoubtedly superior - crispy to the point of crunchy - which was the way I like it. It was done in under ten minutes, and I didn't think cleaning out my pan was all that hard. So I definitely fall in the stovetop bacon camp.

Once brunch was devoured, I set to work at marinating my steak. I bought a flat iron steak, because it was the only cheap cut he had left. I read that this is a relatively new cut in the world of meat, taken from the shoulder, and it tastes best after marinating, much like flank steak. After trimming off a ton of fat from the steak, I laid it in my usual marinade mixture of balsamic vinegar, mustard, lemon juice, water, diced garlic, salt, and pepper - and this time I added some chopped fresh sage from my deck.

I let the steak marinate for about eight hours while I enjoyed a very relaxing Sunday....dreamily reading through pretty magazines on my sundappled bed, and then a scrabble game and pumpkin ale in Black Rabbit's pretty green backyard.


In the evening, I put Jesse to work at the grill. He achieved a beautiful charred crust on the steak, though I have no idea how, because he wouldn't tell me - he's keeping it a "chef's secret"!


For a side, I whipped up colorful smashed potatoes and rainbow swiss chard (the purple tint comes from a mixture of Adriondack blue potato and yukon gold potato). I was going for a cross between potato salad, with its crunch and mayo-mustardy flavor, and colcannon mashed potatoes, dotted with creamy greens. I ingeniously chopped the swiss chard stems into little pieces to stand in for the traditional celery of potato salad, while swiss chard stood in for the cabbage that's traditionally mashed into colcannon. It turned out as deliciously as I had dreamed. I meant to save some for lunch the next day, but it was so good I ate it all at dinner - oops! Together with the hearty iron-rich steak, this dinner was exactly what my body needed!

Smashed Potatoes and Swiss Chard
2 medium-large sized potatoes
1 bunch swiss chard
1 tbsp mayonnaise
1 1/2 tsp mustard
juice of 1/2 lemon
salt
pepper

Rinse and chop potatoes into 2 inch pieces. Add potatoes to a pot of salted boiling water and simmer for about 20 minutes, until tender. Drain in colander, reserving a tablespoon of cooking water.

Rinse swiss chard. Chop stems into small pieces and set aside. Chop swiss chard leaves into chiffonade. Sautee swiss chard leaves in olive oil over medium low heat until wilted.

Combine potatoes, wilted swiss chard, and swiss chard stems in a bowl. Add reserved cooking water, mayonnaise, mustard, lemon juice, salt, and pepper. Stir to combine and then mash with a fork or wooden spoon to desired smashed consistency. Serves 2 as a side dish.

July 3, 2008

Asparagus Frittata with Grated Carrots and Beets


Frittatas are a great way to use up whatever vegetables you have laying around. I had some asparagus in my freezer that I originally intended to turn into soup. But then remembering that I don't actually like my homemade pureed soups, I decided to throw the asparagus in a frittata instead after letting it thaw. And in an extreme example of not wasting food, into the frittata also went garlic scapes that had been steamed with mussels but not actually eaten that night.

Making the frittata was easy as pie, especially with the help of my sister, who's in town again. I love eggs in all forms, so I thought this frittata was great, but it could have used more cheese, so I raised the volume to half a cup for the recipe below. I used an cheddary alpine cheese from Consider Bardwell Farm, but parmesan, swiss, or gruyere would also work well.


I wanted a side salad, but didn't want to buy a whole head of lettuce that would inevitably go bad before we could eat it all, since we're going away this weekend. So instead I bought ruby red beets with large veiny leaves from the farmers market to make Clothilde's Grated Carrots and Beets. To my shock, everyone else near me who was buying beets requested that the beet greens be chopped off. Yes, it does make it easier to transport them, but what a waste of food!

The beet and carrot salad was good, but it wasn't as fantastic as Clothilde's raving led me to believe. For some reason, I didn't expect it to taste so much like carrots. Duh. So of course because I don't love raw carrots, I didn't love this. I even tried adding fresh mint from my deck, but its flavor was too subtle. But if you are a carrot fan, give it a whirl.


Asparagus Frittata

olive oil
1/2 onion
2 or 3 garlic scapes
1 lb asparagus
6 eggs
1/2 cup grated cheese
2 tbsp milk
salt
pepper
dash of cayenne pepper

Preheat oven to 350. Heat olive oil in an ovenproof pan. Dice onion and sautee over medium low heat until softened. Meanwhile, break woody ends off asparagus and chop into 1 inch pieces. Likewise, chop garlic scapes into 1 inch pieces. Add asparagus and scapes to pan and sautee another few minutes. Meanwhile, whisk together remaining ingredients. Pour egg mixture over vegetables and turn the heat up to medium. Cook for five minutes, until the frittata begins to set. Then move the frittata into the oven for another 8-10 minutes until cooked through.

June 24, 2008

Camping at Little Pond

I don't recommend camping just for a night - it's too much prep work to drag out camping gear, figure out food, pack everything up, set everything up, and do it all in reverse again the next day. But that's what we did anyway Saturday, as we found ourselves on a long drive up Route 17 to camp in the Catskills. We stayed at Little Pond Campground, a state campground that actually features a rather large pond with a beach, picnic areas, and hiking trails. There are even some campsites situated tranquilly right on the water, but those were already taken by the time we made our reservation.

The campsites were quiet and more secluded from each other than other campgrounds I've stayed at. Our site was bizarrely large, as you can see below.
Near dinnertime, I tried to grill potatoes in foil, but our fire wouldn't stay consistently hot. After over an hour the potatoes were still raw and hard. We have much to learn in the art of fire-making for our next camping trip. Our propane-powered camping stove is great for cooking, but I would also like to be able to harness the fire's energy for cooking like Liz.

After giving up on the potatoes and chucking them back into the cooler to be cooked later in the week, we turned to making the rest of dinner: burgers on homemade toast (made with local flour before we left) and topped with beer-braised swiss chard. We simply sauteed half a bunch of swiss chard in olive oil and then let it braise in half a can of beer for about ten minutes. It could have used some more spices, but that was all we had on hand and it worked. Then Jesse came up with the idea to put the swiss chard on the burgers, which was brilliant.

The burgers were grass finished black angus from a new Greenmarket vendor, Grazin' Angus Acres. Their farm in Columbia County uses wind power and they also raise chickens to provide the farm's nitrogen needs, inspired by Joel Salatin's sustainable farm described in Omnivore's Dilemna. I recommend taking a look at their website, which has informative information on the health and ecological benefits of grass fed meat. Not to mention that the burger was delicious. And of course, what camping trip is complete without cheap beer? I forgot to pick up tastier local beer, so Jesse's Bud is what I was stuck drinking.


It rained just as we woke in the morning, so we stayed inside the tent until the torrents passed. Unfortunately that meant we didn't have time to cook breakfast before we had to pack up and check out, so breakfast was at Roscoe Diner.

I don't recommend it unless you like institutional style food, down to the bagel that was toast in the shape of a bagel. As I ate it, I realized it's been years since I've eaten that poorly. Luckily, I wasn't a foodie back in the days of my Aramark-catered dining hall, or I don't know what I would have eaten throughout college.

The sun perked up during our long drive home to Brooklyn so I could fully enjoy the lush green landscapes of the Hudson Valley and cry a little inside about not living in the country anymore. Summer in the Hudson Valley is my favorite thing ever. We took a detour on the way to pick up my sister from my hometown and ferry her to the city.

While there, we also stopped at Rosner Soap in nearby Sugarloaf, a cute crafts village, so I could stock up on soap. They make my favorite soap - it comes in a multitude of flavors like lemongrass oatmeal and peppermint tea tree that smell heavenly, it lathers well, it doesn't contain scary chemicals like store-bought soaps, and at $4.50 a bar it's much cheaper than certain $8 Brooklyn-made soaps. Add to that their colorfully painted stores and beautiful flowers, and I get the feel-good buzz of supporting a local vendor.

June 12, 2008

Locavore Potluck


Last Saturday was my much anticipated locavore potluck. I had been awaiting the day since I first thought up the idea sometime over winter - to bring together my friends for the most noblest of potlucks, encouraging them to seek out local food sources. I'll have it in March, I planned, naively expecting that by then the bounty of spring would appear in the farmers markets. And when March continued in winter's fashion, I hoped April would bring fresh vegetables. Until April also did not seem flush enough with green. I almost had a date set in May, once asparagus and lettuce appeared, but scheduling conflicts pushed it back another month.

Then of course nature pulled a trick and jolted into summer with a heat wave, thick and oppressive and blowing hot air and sweat around our bodies. But the show must go on, so I planned to get most of the cooking done in the morning with the hopes that the apartment would cool off before the party. The morning found me at Union Square (bizarrely with larger crowds at 9am than I'd ever seen on a Saturday) to pick up a pork roast from Flying Pigs. Stupidly I hadn't asked for it to be defrosted when I ordered it, so it was frozen solid. Luckily after an hour an and a half in a water bath at home, it seemed mostly defrosted, so into the crockpot along with a sliced onion, barbeque sauce, salt, pepper, and a little water. This is my usual method for making pulled pork, and it couldn't be easier. You just leave it in there for hours and hours on low in the crock pot, maybe turn it up to high for a couple hours, and then back to low, and after about 8-10 hours it shreds when you go to cut it.

While the pork defrosted, I got to work on buns for the pulled pork. I thought the heat would help these babies rise into fluffy buns even more beautifully than last time, but instead they refused to rise and ended up as tight undercooked mini buns. I have no idea what happened, but they sufficed for the purpose. And the mini buns meant that people piled less pulled pork onto their sandwiches, leaving me with more leftovers (muhaha!)

While the oven preheated for the buns, I also roasted some potatoes into fries. Now common sense would dictate that you would not be silly like me and turn your oven on and instead buy hamburger buns and make something like a cold potato salad. But I was determined to use my local flour for the buns. And Jesse insisted on having roasted potatoes since he doesn't like potato salad, and since we had an overflow of potatoes from last week's party, I had to do something with them. So all my sweating in a sauna of a kitchen was my own fault.

I also picked up garlic scapes, which are young garlic shoots, at the market that morning. They are often transformed into garlic scape pestos, but I thought they would be perfect in aioli for dipping the fries. Aioli is essentially garlic mayonnaise, and I found it to be easier to make than I expected. I noticed, though, that I didn't seem to need as much olive oil as the recipe called for, probably because my eggs were on the smaller side. So I recommend slowly whisking in the oil and stopping when the mixture has reached the right consistency, even if you have some oil left over. Mine was creamy and thinner than commercial mayonnaise, but with a much brighter, richer flavor. Now that I know how easy it is, I'll definitely be making my own mayonnaise again, except this time I'll store some in the fridge right away so I can enjoy it later in the week - instead of leaving it all out in my 90 degree living room for more than three hours during the party and then tossing the leftovers from fear.

Although I finished cooking by 2pm, the apartment wasn't any cooler by partytime, but everyone seemed to have a good time despite the heat. Now, the party wasn't entirely local - the invitation just asked that everyone try to bring something incorporating at least one local ingredient. Eating locally is new to most of my friends, so I wanted it to be an encouraging, not daunting, challenge. I was impressed that my guests all made an effort to bring something local, and enjoyed trying all their great food. There was nary a bag of chips or can of PBR to be found.

My sister (who is working at 
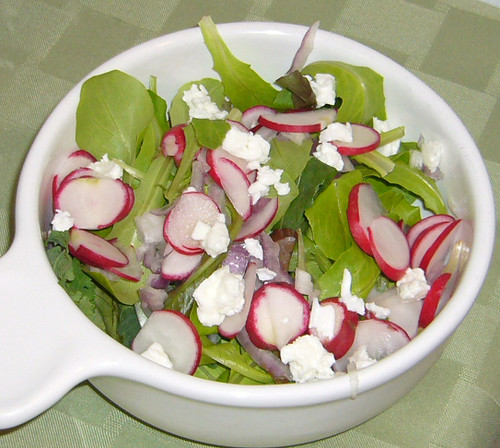
Bobolink for the summer since it's only a 5 minute drive from our parent's home - how cool is that?) brought rosemary bread she'd baked that morning, and one of Bobolink's new spring cheeses, Tarte de Vache (Cow Pie), which was medium soft, grassy and pungent. Two vegetarian couples coincidentally both brought tortellini salad, and another standout was a jar of curry-pickled baby turnips and radishes. There was also a brilliant strawberry rhubarb bruschetta with fresh mint. As well as my pulled pork sandwiches, fries, and heavenly aioli, all local except for the yeast, barbecue sauce, salt, pepper, lemon juice, and vinegar.

For dessert there was a chocolate chip loaf from a Greenmarket bakery, ice cream from Ronnybrook and 5 Boroughs (warning: their Cha Cha Chocolate is super spicy), strawberries, and locally made marshmallows from Whole Foods. And of course, a few bottles of New York state wine, and lots and lots of Brooklyn, Bluepoint, and Southampton beer. The party didn't end until late in the night when all the booze ran out and I was ready to slip into a food and drink-induced coma.


Garlic Scape Aioli

2 stalks garlic scapes
1 tbsp fresh parsley
salt
pepper
1 egg yolk
1 tsp lemon juice
1 tsp vinegar
1/2 cup extra virgin olive oil

Combine garlic scapes, parsley, salt, and pepper in a food processor. Alternately, you can mince them finely, or use a mortar and pestle, but my mortar and pestle doesn't seem to do much so I went the mechanic route.

Scrape garlic mixture into a bowl and whisk in egg and then lemon juice and vinegar.

With one hand, pour olive oil very slowly into the bowl, while whisking briskly and continually with the other hand. (Not as hard as it sounds.) If you add too much oil at once, just pause your pouring and whisk until it is incorporated. Taste occasionally, and once the mixture has reached your desired consistency and taste, stop adding oil.

Store immediately in an airtight container in the refrigerator for up to five days. Serve with fries, fish, asparagus, or spread on sandwiches.

June 4, 2008

A Pleasant Surprise


So my sister's aforementioned graduation party took place this past weekend. The menu we planned sounded impressive, but in the end I felt it all fell a little flat. My rosemary roasted potatoes nicely browned but then grew soggy in the hours before they were served. My brownies came out neither fudgy nor cakey, but chalky. The chocolate coating for the strawberries was pasty and watery due to the low quality chocolate chips my mother procured from Shoprite. Then there was the oozing overly lemon zested icing on the lemon ricotta cake; the gummy rice in my rice, chickpea, and asparagus pilaf; the overly lemony hummus and the overly garlicky white bean and spinach dip. We love to cook, but aren't always that great in executing our menus. But everyone still ate most of the food and seemed to like it, so I wouldn't call it a failure by any means.


While at home in Warwick for the weekend, which is positively verdant this time of year, we had the chance to not only enjoy a double feature at the drive in despite the rainy forecast, but to check out the Warwick Farmers Market. It wasn't too large, but featured lots of baked goods, wine, homemade gourmet goods, plants, and a couple meat and vegetable stands. Since my hometown is about 50 miles outside of New York City, there is some overlap between our farmers markets. I was thrilled to see Dines Farms, which used to be my main meat guy until they were kicked out of the McCarren Park Greenmarket for some reason. I had a reliable source of tasty chicken up until then, and haven't had much chicken since. So we got a huge chicken breast and some mushrooms from Dines Farms to cook up for dinner, as well as some kind of wild green from Rogowski farm, which they told us was a kind of Mexican spinach, so I think it was quelites.


We rounded out our dinner plans with a bottle of Seyval Chardonnay Reserve from Applewood winery, which is aged in oak, making it more complex than Applewood's slightly cheaper regular Seyval Chardonnay blend.


We planned on taking a hike but got lazy and read books instead in my sunny backyard before taking our booty back to Brooklyn to cook up dinner. Can you blame us?


I wanted to keep our things really simple, so I didn't even add onions or garlic or any spices. I just chopped up the mushrooms and the quelites, sauteed them in olive oil with a couple glugs of the wine and shakes of salt and pepper, and covered the pan for about 15 minutes until wilted. So simple in fact, that that's really all of a recipe you need.


Meanwhile, Jesse grilled the hunka chicken along with a couple buttery yellow potatoes from Berried Treasures in a pocket of foil because we are potato addicts. We ate about a third of the chicken that night and smartly saved the rest in the fridge for future use (such as in the yummy chicken, radish, lettuce, and mayonnaise sandwich I just ate for dinner tonight).


But back to that night's dinner. I quartered the potatoes and slathered them with Ronnybrook butter and a sprinkle of fresh sage from my container garden. Then I sliced up the chicken and laid it over the sauteed quelites and mushrooms to practice my plating skills. Plunked down a glass of that white wine. And yum. Now, I've never liked mushrooms very much, but I really enjoyed these. Something about the earthy sour smell usually turns me off, but I always had this hope that maybe it would be different with mushrooms from the farmers market. So that's what led me to give these mushrooms a whirl, and it was a pleasant surprise - their smell and flavor was mild enough to just give a meaty oomph to the sauteed greens without overpowering my nosebuds. Success! If only I knew what they were called so I could find them again. Name that mushroom? Anyone?


It feels like the Dark Days Challenge just ended, yet here is two months later, moving on into One Local Summer. The challenge is this: to prepare and blog about one meal each week using only locally grown ingredients - the exceptions are oil, salt and pepper, and spices. Reading One Local Summer was what inspired me to start cooking local meals in the first place last summer, but I was too late in the game to join. Now that eating local is old hat, here goes another delicious summer, starting with this very first OLS entry of the summer.

May 22, 2008

Learning to Love Turnips


The fun part about eating seasonally is getting to try new things. There has been a lot of that so far this spring, what with the ramps and spring garlic. When I was at Union Square last week on one of my semi-regular lunchtime farmers market trips, I came upon turnip greens, and realized they would be the perfect side to the bison flank steak I had marinating in the fridge for dinner. At this time of year, the turnip greens are attached to little turnips freshly plucked from the ground, so you can eat the whole plant.


my how dirty you are

I feel like Alice Waters, cooing over baby vegetables emerging from the earth, such as turnips and radishes, that can be sliced and eaten raw in salads or dipped in mayonnaise or butter and popped whole into one's mouth. I added some baby turnips to a variation on my Greek salad last week and they served me just fine.


before: raw potatoes and turnips

However, I've never been a fan of roasted or mashed turnips, which always seem to more sour and bitter than their raw counterparts. But give that I'd only ever roasted old turnips that had been stored winter-long, I thought I would give these baby turnips the benefit of the doubt and hope that they would come out sweeter. They didn't.


after: rosemary roasted potatoes and turnips

But luckily, I also roasted potatoes alongside the turnips to round things out. I scattered olive oil, salt, pepper, and dried rosemary from my container garden over the veggies, and roasted them until they browned on the bottom. Mmm. I managed to eat all of my turnips, with the help of mouthfuls of roasted potatoes.


before: just-washed turnip greens

As for the turnip greens, I wasn't sure how to cook them. I ended up steaming them and then sauteeing similar to my typical kale preparation, which seemed appropriate because its shape, broad leaves intersected by thick stems, reminded me of kale. However, unlike kale, these greens actually do wilt down - from what seemed to be an overwhelming bunch of greens that I feared we would be eating for days, down to two manageable side portions. And those two portions were delicious, healthy, and restorative - a deep green, a little sweet and not so bitter, warmed up with lemon and mustard. Apparently turnip greens are so full of vitamins that they are on the list of the world's healthiest foods. Paired with garlic, also on the list of world's healthiest foods, extra virgin cold pressed olive oil, lean and iron-rich bison steak, and roasted potatoesand turnips, this was one healthy meal indeed. Nothing like devouring a terrific meal and feeling good about myself while I do it.


after: sauteed turnip greens and spring garlic

Sauteed Turnip Greens and Spring Garlic

1 bunch turnip greens
extra virgin olive oil
2 stalks spring garlic
1 tbsp mustard
2 tsp lemon juice
1 tbsp water
salt
pepper
crushed red pepper

Chop baby turnip roots off turnip greens and reserve the turnips for another use. Rinse greens thoroughly. Trim off the stems, and chop rough pieces.

Steam over simmering water for about five minutes, stirring occasionally, until the turnip greens are mostly wilted.

Meanwhile, mince spring garlic and sautee the garlic in olive oil over medium low heat until softened and slightly browed. Add turnip greens and continue to sautee, turning the heat down to low. Whisk together mustard, lemon juice, water, and spices in a bowl, and then add to the pan, stirring to combine. Cook another few minutes, until greens are completely wilted.

May 21, 2008

Rice Pilaf with Chickpeas and Spring Vegetables


My dear fun sister Lisa is graduating from college next week, and what would graduation be without a party to celebrate? My mother has relinquished cooking responsibilities for her graduation party to Lisa and I, our family's resident foodies. I love planning and cooking for parties so it wasn't long before we started brainstorming ideas, some of which will surely appear here after the fact. Among those ideas was a light pasta with spring vegetables, which transformed into a rice pilaf instead, because I have a hard time warming up to tomato-sauce-less pasta. I made a test run tonight, and the healthful combination of rice, chickpeas, and tender green vegetables was so wonderful that this one is being added to my rotation.

Spring garlic, also known as green garlic, has just come into season and is making the rounds on the blogosphere. I was eager to try it when I saw it at Union Square today, especially because I figured it would go perfectly in the rice pilaf I had planned for dinner. Spring garlic looks, slices, and cooks like the texture of a small leek, but with a sharper garlic taste and smell. I wasn't sure if I could cook the whole plant, since google resulted in conflicting advice. In his artful New York Times article, Daniel Patterson seems to be telling us only to use the white and light green parts. Meanwhile, Farmgirl Fare encourages us to go ahead and use the whole thing. So I did what seemed right, which was to use the whole stalk, minus the tough outer dark green leaves. Someone correct me if I'm wrong.


This dish is brilliant and warm and very green, like early spring. The creamy chickpeas, heightened by an hour of simmering and a bright tinge of lemon, contrasted perfectly with crunches of asparagus and mouthfuls of soft rice. It would have been more perfect if I were capable of cooking fluffy rice instead of the gummy wet rice that always comes out of my saucepans, but that's a challege for another day. I used a mixture of brown short grain rice and black himalayan rice, lending it a colorfully dark hue, but any rice that pleases you would suit this, as would bulgur or orzo I think.


Likewise, other spring vegetables such as peas or fava beans (which are not yet in season here in New York) would also do well in this dish. I couldn't much discern the green garlic, but I'm sure it helped things along. The parsley came from my herb garden, where it is flourishing over all the other herbs, straight on its way to becoming a veritable bush of parsley. And the cheese is optional, but cheese makes everything better, don't you think? I was out of parmesan, so I used a sharp Edam-like cheese, or a swiss cheese would work.


Rice Pilaf with Chickpeas and Spring Vegetables

3/4 cup dried chickpeas
1 cup rice
2 stalks spring garlic
1 bunch asparagus
couple handfuls baby bok choy
1 tsp lemon juice

The day before or that morning, place chickpeas in a pot covered with a couple inches of water to let soak.

After 6-24 hours, drain chickpeas, rinse, and return to pot. Refill with water, again covering chickpeas by a couple inches, and add a pinch of salt to water. Bring to a boil and then let simmer 45-90 minutes until chickpeas are tender. Drain and set aside.

Just after starting chickpeas, combine rice with 2 cups water and a pinch of salt. Bring to a boil and let simmer until rice is tender.

While chickpeas and rice simmer away, clean spring garlic as you would leeks and dice its stalks, discarding tough dark green leaves. Sautee spring garlic in olive oil over medium low heat.

Rinse asparagus and break off woody ends where the asparagus naturally breaks in your hand. (Reserve ends for future use, such as soup or dip.) Chop asparagus into one-inch pieces and sautee with garlic for a couple minutes.

Rinse and roughly chop baby bok choy and add to sautee pan. Continue to sautee another few minutes until wilted.

Combine chickpeas and rice in pan with vegetables. Stir in lemon juice and salt pepper and pepper to taste. Add grated cheese, if desired, and garnish with parsley.

May 9, 2008

Impromptu Greek Salad and Homemade Hamburgers


Ever since I eagerly devoured an awesome Greek salad at Westville in the West Village, I have been craving the combination of leafy greens and creamy feta. So Wednesday during lunch I followed my cravings. I wandered through the Union Square Greenmarket, beginning with a selection of a variety of lettuces, bright red radishes that were calling out to me, a red onion, and finally, feta cheese from Lynnhaven Farms. Back in midtown, I stole little plastic cups of balsamic vinegar from the deli across the street (shhhh). Then at my desk, I chopped and assembled the. best. impromptu lunch ever. The lettuces had that lively tenderness that signaled freshness.

So I assembled the same salad to accompany burgers for dinner that night, and then for lunch a couple of days later. By then, it was clear that two days in the refrigerator had taken their toll on the lettuce, and they now had the more wilted quality of supermarket mixed greens. See, the difference is noticeable! And although $6 per little tub, the feta cheese was worth it for its creamy, salty tang. It was reminiscent of the goat cheese my mom made when I was a child from the milk of the goats raised in our backyard barn. I didn't know how good I had it then.


As for the burgers, the meat was ground chuck from Hawthorne Valley Farm, picked up from the Greenmarket a week ago and frozen solid. While it took its time defrosting in a water bath, I improvised some hamburger buns that came together surprisingly quickly. The key was taking the necessary amount of flour and yeast out of the refrigerator that morning so they were nice and warm when it was time for baking after work. I used half whole wheat and half all purpose flour to give it a little more fluff than my usual dense all whole wheat bread.

It was a test run for my locavore potluck next month, and they came out good enough that I will be serving them again then. They may not be perfectly round and airy like store-bought buns, but they will be wholesome, made with simple ingredients, and hot from the oven. The recipe below is more for my reference so I can replicate it. And not so much a hard and fast recipe. Because there are things I'm not sure about. Like the ideal size of the pan, and whether the pan needs to have sides so that the buns rise upward. Advice is welcome.

Jesse prepared the burgers with worcestershire sauce, and some freshly chopped sage from the deck. He grilled them to medium-rare perfection served with those salad ingredients again - sliced red onions, lettuce, and feta cheese, albeit non-local ketchup of course. Yum. I'm glad it's grilling season again, that our grill is fixed after a two week hiatus, and that we have another package of local hamburger meat awaiting us in the freezer for a future barbecue.

Hamburger Buns
2 tsp active dry yeast
1/2 cup warm water
1 1/2 cup whole wheat flour
1 3/4 cup all-purpose flour
1 tsp salt
2/3 cup warm water
1 tbsp olive oil

Combine yeast and 1/2 cup warm water and let sit a few minutes until bubbly.
Meanwhile, combine flour and salt. Then add olive oil, yeast mixture, and half the remaining water. Combine in bowl with a rubber spatula. Add additional water as necessary until a slightly sticky dough forms.

Turn dough out onto a floured surface and need 10 minutes, adding flour as needed so it doesn't stick to everything. Return to bowl, cover with plastic wrap, and place in warm place for 40-60 minutes until doubled in size. (My warm place is inside my gas oven with the door propped open, and in that situation, the dough was over-ready and sighing back on itself when I poked holes into it at 45 minutes, so make sure you check on it periodically.)

Preheat oven to 400. Grease two small or one large baking pan. Turn dough out onto a floured surface and gently press down, pressing out air bubbles. Divide in half and set one half aside under the bowl. Divide each half into five balls (ten balls total) and place on pan. Cover with greased plastic wrap and let sit 25-35 minutes until proofed - the rolls will touch each other slightly. Bake for approximately 20 minutes, removing when rolls are golden brown and hollow when you tap the underside.

May 4, 2008

The Brooklyn Botanic Garden and the Perfect Spring Dinner


Now that it's spring, what better way to celebrate than to head to Brooklyn Botanic Garden to see the cherry trees in bloom. Admission is free on Saturdays if you can manage to get there before noon. So last weekend after our hearty breakfast of eggs and ramps, we biked down to the BBG. Well I thought it would be mostly downhill. I'm not sure why, except that going south always seems like it should correspond with going downhill. Little did I know that it would actually be uphill most of the way on Washington Ave to the Brooklyn Botanic Garden. I guess that would be why they call it Prospect Heights. I was huffing and puffing, and the hill seemed to have no end, with just ten minutes to go before noon. But we managed to make it with minutes to spare. And it was worth it to see tons of pink cherry trees in full bloom.


I particularly liked the culinary beds, to indulge in fantasies of my own vegetable garden. I think swiss chard is such a pretty plant, with its bright colors and shiny leaves.


I also liked the garden paths winding around a pond with Japanese sculptures, lined with elegant weeping cherry trees, willows, and Japanese maples, complete with cute turtles sunbathing on rocks!


There weren't a lot of flowers out this early in the spring, but there were pretty tulips.


I'd like to go back later in the summer to see how the garden changes with the seasons, to enjoy more colorful flowers, and to see how the vegetables and herbs in the culinary beds have grown.


Later that night we enjoyed a great dinner that felt so wonderfully springy because I was lucky enough to find the first asparagus of the season at the Greenmarket the day before. I snapped the tough ends off the asparagus, rolled them in olive oil, salt, and pepper, and then roasted them for 10 minutes at 400. Meanwhile, I let some quinoa simmer away while Jesse pan-fried thin flounder filets in olive oil and seasoned them with salt pepper.


To top it off, I mixed up an herb mayonnaise using garlic, lemon juice, and some parsley from my urban garfunkel garden. I'm not a big fan of quinoa. Although Jesse loves it for its high protein content, and we often substitute it for pasta or rice for that reason, I think it has a dull soft taste that can sometimes ruin a dish. But with a dollop of lemony fresh mayonnaise, the quinoa was transformed into something I could enjoy. And that is something to cheer about.


We enjoyed dinner with cold mugs of Wiesen Edel-weisse beer. It cloudy wheaty bright taste, great for warm spring or summer days, was the perfect complement to our meal.